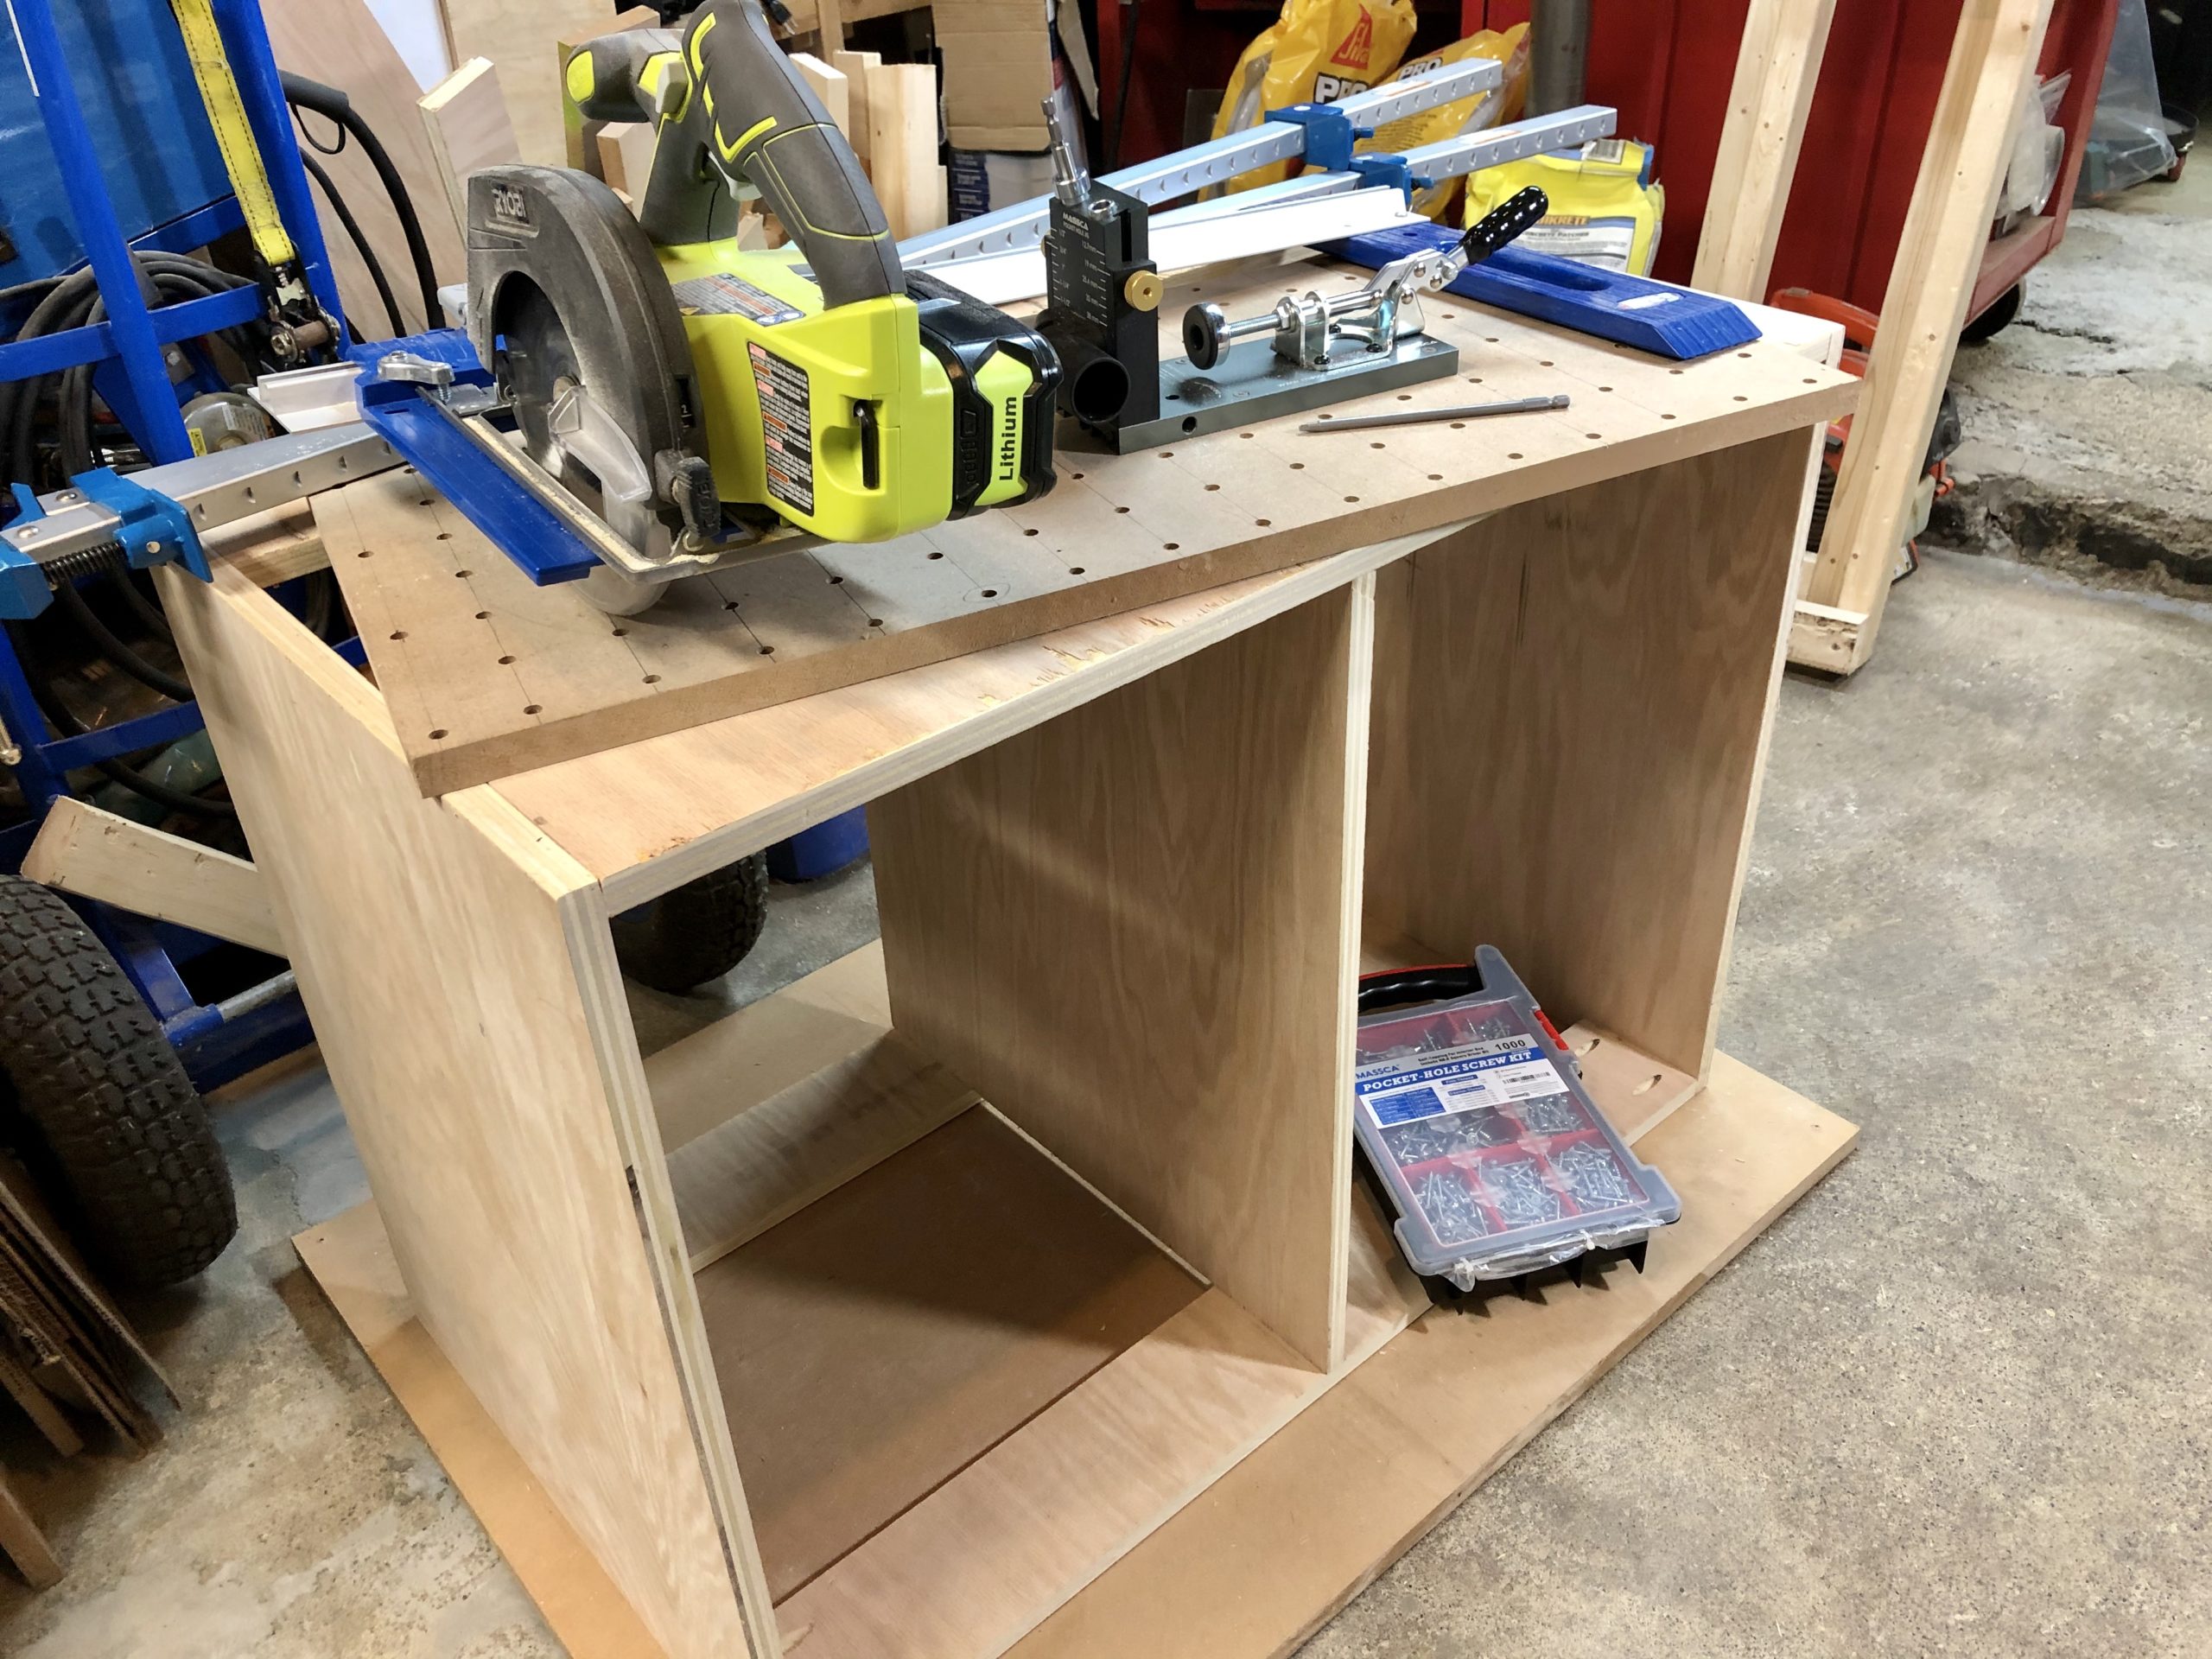
 I’ve finished the “carcass” for the drawers that I’m adding to a workbench. The carcass is what holds the drawers and it’s going to slide into the opening in the bench. It’s extremely important that it is made with sides that are perfectly parallel or the drawer slides won’t work well. The center divider also needs to be parallel to the sides and also exactly in the middle so the drawer boxes will fit perfectly on either side. The slides can handle a small amount of error, but it’s only 1/32-inches on each side.
The key to getting it right is to make the “stretchers” exactly the same length. That’s pretty easy if you’re cutting them with a chop saw that’s on a table or stand that has an adjustable stop block. But I don’t have one. I’m an infrequent woodworker with a very basic chop saw that just sits on the floor when I use it. Still, I seem to have managed to get everything square and parallel.
I was going use 1/2-inch birch plywood for everything. But when I went to buy the wood I decided that it was too “bendy” for the carcass, so I used 3/4-inch thick plywood instead. I will still use 1/2-inch plywood for the drawer sides but now I’m going to use 1/4-inch sanded plywood for the bottoms and 3/4-inch MDF for the drawer faces
I was also going to use self-closing soft-stop drawer slides, but I bought these conventional slides instead. A lot of reviewers complained that the self-closing feature quickly stopped working or it didn’t work at all. One reviewer convinced me that the most likely reason is that the drawer slides weren’t parallel. I wasn’t sure how good mine were going to be so I didn’t buy the self-closing ones.
I probably should have bought them anyway, because it probably wouldn’t be a big deal if some didn’t self-close. But I am pleased with the ones I bought. Ten pairs of 18-inch full-extension drawer slides cost me for $74, and they came with screws, most slides don’t.
In other words, each pair of drawer slides cost me about $7.40. That’s less than half of what I would had paid for comparable drawer slides at a big home improvement store.
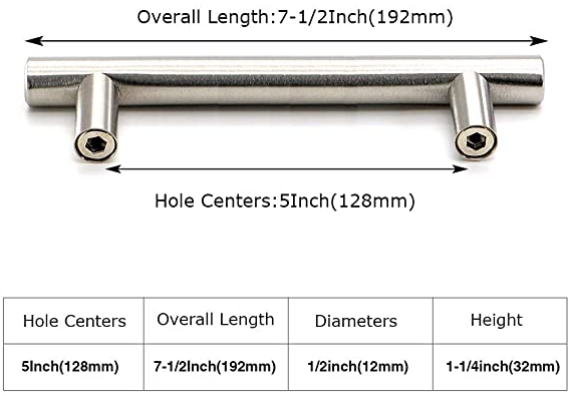 I also purchased drawer pulls from Amazon that I really like. They are available in numerous lengths and I bought a 10 pack of 7-1/2 inch long stainless steel pulls for $20. That’s $2 each.
Many others like these drawer pulls too. The have a 4.5 rating and more than 6,000 reviews.
My workbench is going to have eight drawers and the hardware (slides, pulls and pocket screws) for each drawer is going to cost about $10. All of the wood is going to cost about $180 and I’ll have a fair amount left over.
The drawer boxes are going to be left unfinished, which I understand is pretty common. The MDF drawer faces will be primed with Zinnsser BIN and they will probably be painted barn red to add some color to my workshop.
I thought about putting iron-on edge banding on the plywood edges to improve their appearance but I’m not going to. FYI, 50 feet of highly-rated birch edge banding is about $16 on Amazon and 250 feet is about $30.
All the wood was cut using the Kreg Rip-Cut Circular Saw Guide and Ryobi cordless circular saw that you see in the picture. It also shows you my new pocket hole jig and my inexpensive Harbor Freight Bar Clamps.
This is the first time I’ve ever made anything using pocket hole screws. I like this method of joinery and I wish I’d started using it sooner.
I had to buy a pocket hole jig and I bought the instead of the popular Kreg K4 which is featured in a lot of YouTube videos. It’s the same price as the Kreg jig, but it’s made from solid aluminum instead of plastic and it has large brass adjustment knobs. It’s a beautiful tool and it’s made in the US.
The Massca jig also has a dust spout connector so you can attach a shop vacuum to it, and I think this is very important. Drilling the holes without a vacuum attached is much slower because the holes are big and there are lots of chips getting in the way (and wearing the drill bit out faster). Drilling is easier with a shop vac and you don’t have a mess to clean up after.
The Massca jig includes everything you’ll need – the jig, the drill bit and stop, a gauge for setting the drill bit length, an assortment of pocket screws, and a 6-inch long driver bit for the screws. The basic Massca kit goes for $99 on Amazon and I spent $10 more for the M2 version, which comes with extenders that help support wide panels while you drill them.
By the way, Massca, Kreg and many others sell pocket hole jigs that are much less expensive than the one I bought. You can spend as little as $20 for a complete jig kit that will give you the same results as mine. They just won’t be as as fast or as easy to use.
You’ll need clamps to hold the pieces together while you put in the screws and the Harbor Freight bar clamps were perfect for this part of the project. I bought them a long time ago because they were on sale for a great price and I never used them until now. They are about $15, or less if you use a coupon.
I don’t like spending money on clamps, even though it’s really useful to have a large number and variety on hand. So I acquired a collection by buying just one or two whenever I saw a good deal on them at Harbor Freight.
I purchased a Massca Locking Faceclamp because Kreg kept using their version in their videos. I don’t expect to use it for this project and I’ve learned from a woodworker on YouTube, with a gazillion views and subscribers, that he almost never uses his.
I also purchased two WETOLS Angle Clamps for $19 each that I think are fantastic and far better than the corner clamps I’ve been using. Unfortunately, they came too late for this part of my project
You don’t have to use “pocket hole screws,” but I learned from watching videos that they work much better. I was going to need more so I purchased the Massca 1000 pc pocket screw assortment for $45. They came in a really nice storage container and with a 6-inch long #2 square driver bit.
Update
As usual, my blog posts are far behind what I’ve been doing in my workshop. Since I started this post I have finished mounting the drawer slides in the carcass and inserted it into my workbench, which it fit perfectly.
I also ordered a 10-inch Dewalt table saw that will take about 4 days to arrive. I bought the table saw because the drawer boxes have to fit perfectly. To achieve that I have to determine exactly how wide they need to be and then cut ALL of the front and back pieces to exactly that width.
I could do that if my chop saw could make 6-inch wide cuts and if it was mounted on a stand or table where I could use a stop block, which would ensure that cuts are exactly the same length. Mine can’t, so I’d have to buy a sliding miter saw and find a place to store it. I’d also have to buy or build a stand for it, which would also take up space that I don’t have.
After careful consideration I decided to buy a table saw instead. It’s a portable contractor saw with a stand that folds so the saw can be stored in very little space. There were more important reasons for choosing it and if you want to know what they are then read this post.