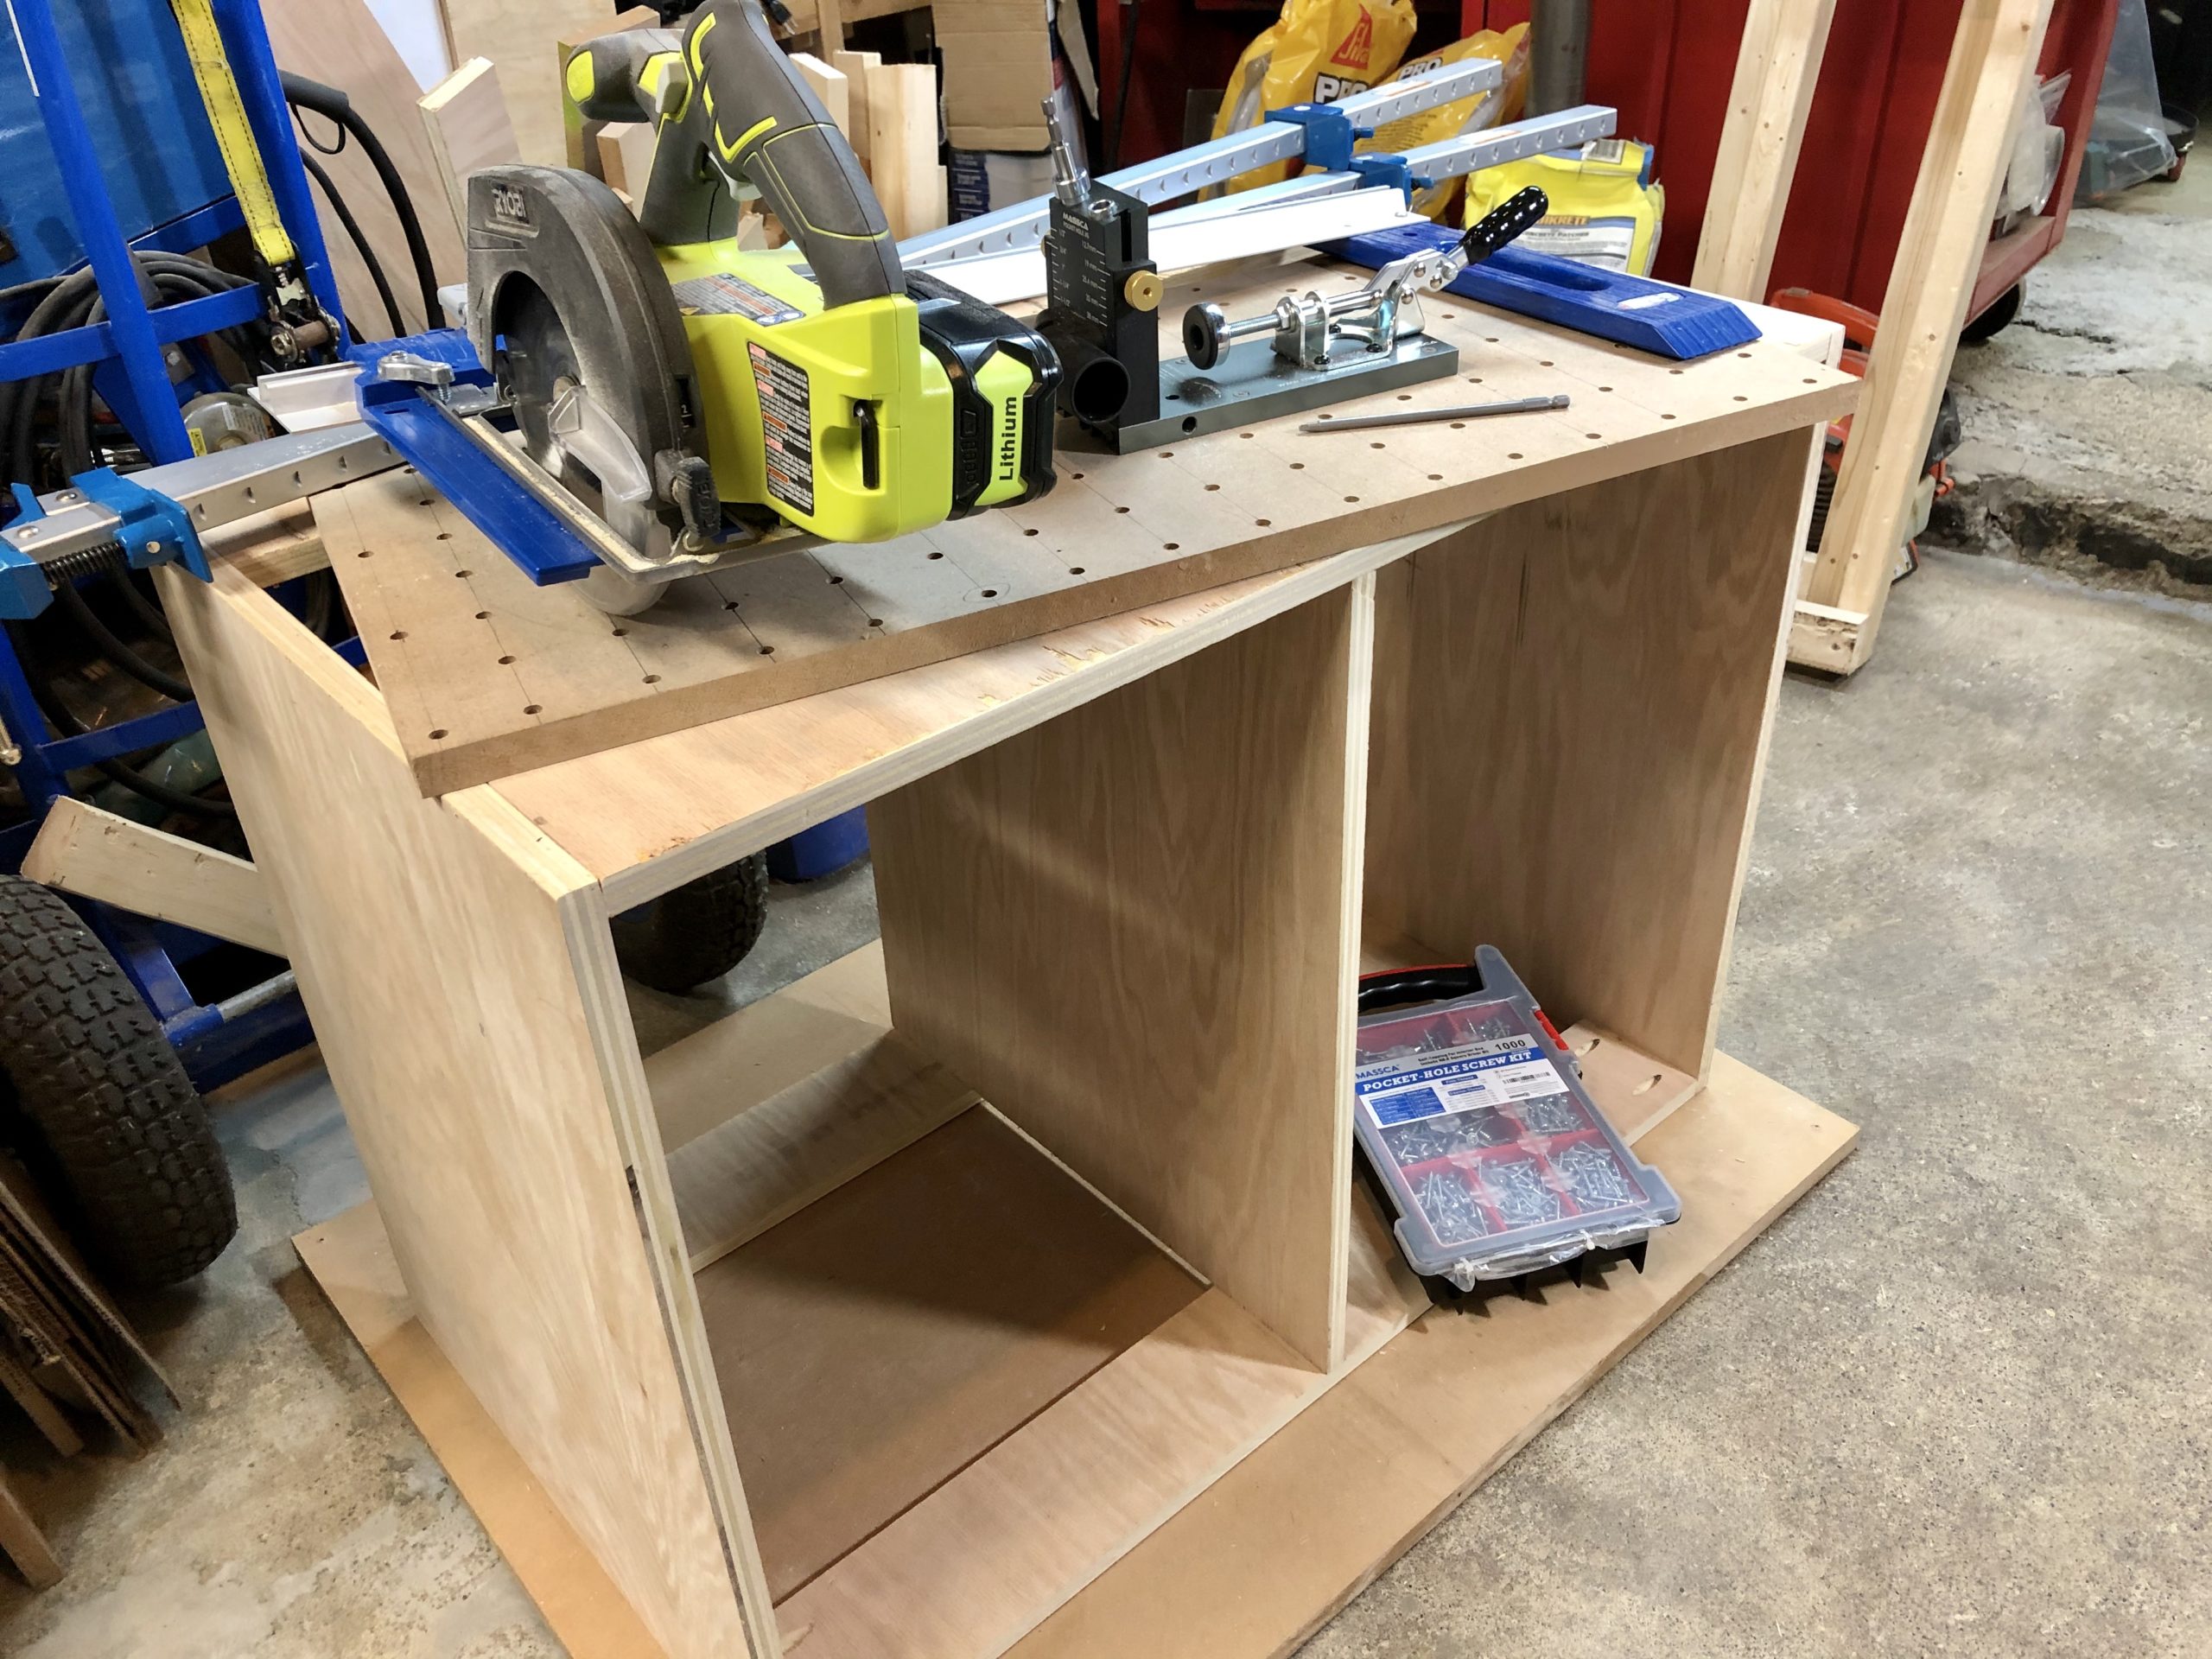
“Nearly every man who develops an idea works it up to the point where it looks impossible, and then he gets discouraged. Thats not the place to become discouraged.” -- Thomas A. Edison
Even though YouTube seems to have umpteen million videos about machining I’ve found very few that will you show how to grind HSS bits for a metal lathe. And most of them show it being done on special grinders or with the help of jigs and accessories that most of us don’t have. These four videos by Tubal Cain, the author of many books about machining and metalworking, are among the few I’ve found that will show you how to do it free-hand on the kind of grinder most home machinists have. [This is not the same Tubal Cain who wrote more than 20 books and 200 articles about machining and model engineering. That was the late Englishman T. D. Walshaw who used "Tubal Cain" as a pen name. This "Tubalcain" appears to be a retired shop teacher living in Illinois. - Rob]
The videos are good, but not great because they’re too long. “mrpete222″ doesn’t get to actually showing you how to grind a bit until the fourth video. During the first three he discusses the shapes and angles of the various kinds lathe bits using large wooden models that make it easier to see what he’s talking about. He also discusses the tool bit holders used by older lathes, which hold bits at an angle so they don’t need back rake added to them.
I’ll admit I’m not real good at grinding lathe bits because I usually use carbide inserts. But I did learn a lot from these videos including these two great suggestions:
Use lay-out dye and mark out the angles you need to grind
Practice on mild-steel (keystock). It’s cheaper and grinds faster.
Would anyone like to volunteer to write a review of a new free 2D CAD program called Draftsight? It looks intriguing but I don’t have time to write one myself. I’m also not a very experienced CAD user and I would like to hear the opinion of someone who is.
I did take a quick peek at it and here’s why I think it deserves a closer look:
It’s free and based on an “open” business model.
It’s from the maker of Solidworks, the popular 3D CAD program.
It’s quick and easy to download, install and register.
The user guide (PDF) looks like it’s very well written and includes a couple of tutorials for new or inexperienced CAD users.
There’s a free “community” forum where you can find help if you need it.
It runs on Windows and later this year it will be available for the Mac OS and Linux.
I’ve heard its user interface is similar to AutoCad’s and I’d really like to know if that’s true. I’m going to be taking an AutoCAD class in August and I won’t be able to afford a copy of it when the class ends. So I’d like to know how easily I’ll be able to apply what I learn to Draftsight.
You don’t have to write a long review. Just give it a try and tell us what you think. Also tell us how much experience you have with CAD programs and if you think Draftsight would be a good choice for new or inexperienced CAD users.
This photo essay will show you how to remove the intermediate gear and shift lever from the head of a Sieg Industries X2 mini-mill [HF 44991, Grizzly G8689, Micro-Mark & others]. It also explains why you might want to do so after installing a belt-drive. You may also find it useful if you need to replace a broken intermediate gear.
Why you may want to remove the gear
I’ve installed a belt drive kit on two different mini-mills. With the first one I didn’t feel there was any need to remove the intermediate gear. But the second mill had a much noisier gear train, both before and after I installed a belt drive. It also had a very slight vibration when running the spindle at high speeds. Removing the gear made it much quieter and eliminated the vibration. By the way, belt tension can also cause your mill to be noisy. I suggest you experiment with it if that’s your issue.
This might be a good time to check and fix your Spindle/Column alignment
Mini-mills sometimes suffer from a misalignment of the spindle and column that can’t be fixed by tramming the mill. Fixing it requires removing the head from the column, which you’re going to have to do anyways to remove the intermediate gear. So this would be a good time to check your mill and fix it if it’s misaligned. Earl Hackett wrote a nice procedure that will tell you how to do it.
I chose not to because I didn’t have a lot of time and I plan to take my mill apart again for some other modifications.
I suggest taking the following precautions if you do this
Disconnect the power to your mill. You don’t want to accidentally turn on the motor. You’re also going to have to open up the control box to remove it from the head.
Be careful when disconnecting the torsion-arm spring that supports the weight of the head. You don’t want your fingers to get pinched, the bolt to fly into your face, or the head to suddenly drop onto the table.
Don’t strain your back or hurt yourself in some other way while lifting the head off the column or reinstalling it. It’s heavy and it may put you in an awkward position. It would be good to have help.
It’s always a good idea to wear safety glasses in a workshop.
The first step is to remove the head from the column
You’re going to have to slide the head off the column before you can remove the intermediate gear. I’m not going to describe in detail how to do it because I have a CNC mini-mill and the procedure is different for a manual mill. But in a nutshell, you’re going to have to disconnect the support spring for the head (be careful that you don’t get hurt by the spring or let the head drop onto the table). You’re also going to have to remove the control box mounted on the side of the head by removing three screws inside the box (Make certain you’ve unplugged the AC power cord first). You’ll also have to remove the motor and spindle nut. My article about installing a belt drive can show you how.
I’ve been looking at the machinist apps in Apple’s App Store for while but I haven’t tried any of them until now. I found one that looks good and gets great reviews, but it costs $9.99 and I’m just too cheap to buy it. The less expensive apps ($.99 – $2.99) either have bad reviews or they seem limited and not very useful. You can find them yourself by searching in the App Store for “machinist” and “CNC.”
So I was very pleased when The Evil Machinist published a free app called iMachinist. As I said it’s free, it’s pretty good and it’s probably going to get even better because it’s a “community driven engineering calculator”. Just send the author an email with a formula you’d like to see included and he’ll do his best to add it. I recommend giving it a try. It’s a good app.
Just write your comment and give us your email address. If it's not spam we'll approve it, register you as a user and send you a password which you can change if you want.
Recent Comments