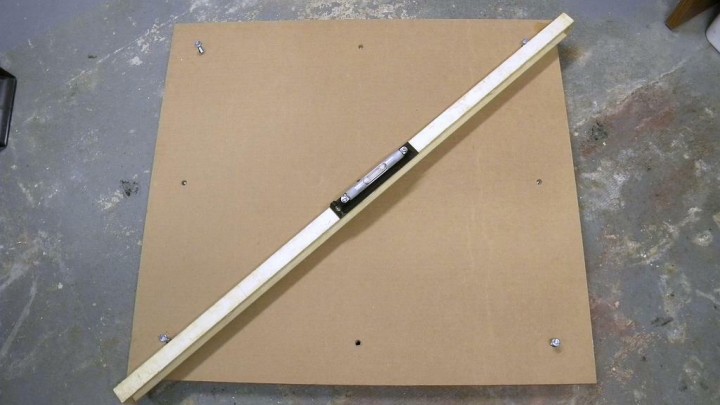
 I needed a large and very flat work surface to build my CNC router table on. I didn’t have a big enough workbench and I didn’t want to take the time or spend the money to build one. And concrete floors aren’t as flat as you might think, especially mine. So I used a 3/4-inch thick piece of MDF, some 3/8-inch tee nuts and bolts to build a temporary flat work surface on my basement floor. Here’s how I did it:
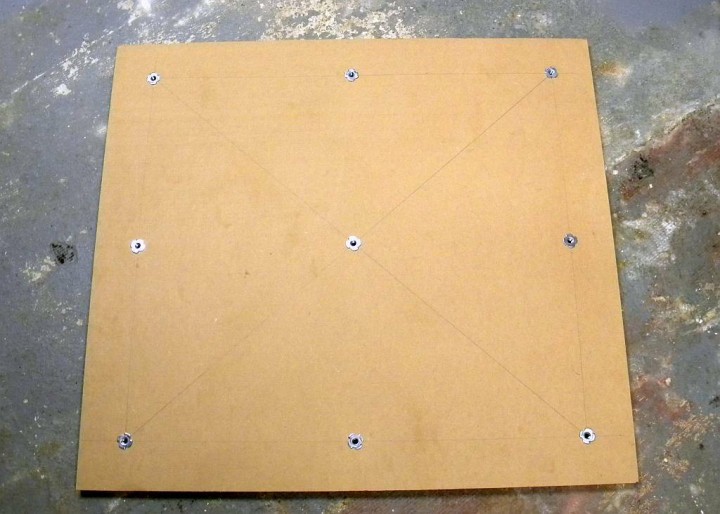
- I marked the locations for the tee nuts by drawing lines 3-inches from the edges of the MDF to leave room for the pieces of my router table. I also found the center of the board by drawing diagonal lines from the corners.
- I installed 3/8-inch tee nuts at the corners of my drawn rectangle, at the center of each side, and at the center of the board. Then I put bolts in just the four corners and screwed them in about half-way.
- The next step was to level it, which was easy. I placed a long construction level on the diagonal between two corners and adjusted the bolts in those corners until it was level (at least one of the other two bolts should not be touching the floor). Then I leveled the other diagonal by adjusting its corner bolts.
- I double checked to make certain all the edges were level and made some small tweaks. When I was happy with the results I screwed in the other bolts until they just barely touched the floor. Their only purpose was to make certain the MDF didn’t sag where it wasn’t supported by the corner bolts. They may not even be necessary, especially if you’re only going to use it for a short time.
A machinists level is more precise
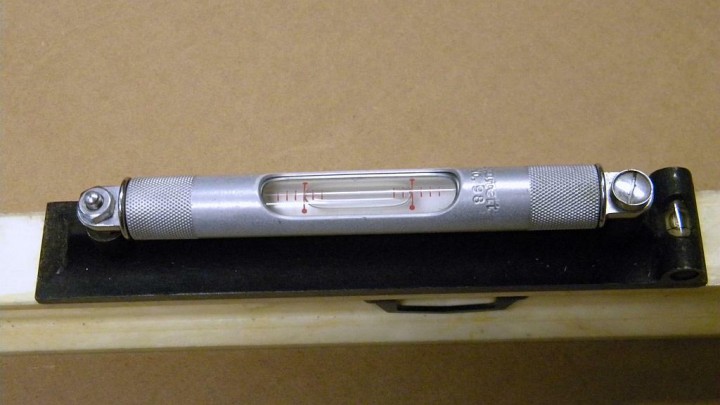
I have an 8-inch Starrett machinist’s level that I’d never really used before this. I put it on top of my construction level and was amazed at how much more precise it was. And when I put it directly on the MDF it showed small raised areas around the tee-nuts that I’d probably created by pounding them in with a hammer. They weren’t enough to matter but I could have avoided them by hammering the nuts in just enough for their teeth to make contact with the MDF. Or I could have ground or filed their teeth off leaving only the flanges because there was probably enough friction in the holes to keep them from turning.
By the way, don’t buy a traditional machinists level unless you can get one for a very good price like I did. Digital levels cost much less, they’re at least as accurate and they can do more tricks. I’ll say more about that when I talk about getting my router’s rails parallel both horizontally and vertically.
MDF or Particle Board?
I was going to use particle board instead of MDF because it’s stiffer, stronger, cheaper and the sheets I’d bought in the past always seemed to be very flat. I’d put a sheet of particle board in my shopping cart but when I went to have Home Depot cut it I noticed it had a very noticeable curve. An employee was waiting so I quickly decided to use MDF instead. MDF seemed to work well for this project but I’m not sure it was the best material to use. I’d like to know what you think.
Giving credit where it’s due
I didn’t come up with this idea myself. I learned it from this video which shows it being used to create a level surface for candle molds.


MDF should have a good flat surface but may change shape under load or if it gets wet.
When you are installing tee nuts, you will have better success if you press it in rather than hammer it in.
To press it in, drill a hole in a scrap piece of wood.
Insert using a flat washer and bolt, screw the bolt into the tee nut so that the threads will pass through the hole when you position the tee nut for insertion.
Place the scrap piece of wood onto the bolt and then another flat washer. Now screw the nut onto the bolt and tighten it down. As you tighten it down, the washer will that the nut is touching will press into the scrap board and at the same time draw the tee nut into the board.
This is not as fast as a hammer, but you do avoid damaging the board or having a tee nut’s prongs flatten should the hammer hit unevenly.
Scott
Dear Mikey, My query relates to your article on rebuilding a Albrecht drill chuck. Following your advice I have stripped my Metabo similar chuck. I find that the spindle and body are seized together and in spite of my efforts to undo the left hand thread they will not come apart. I have held the jaw end of the spindle in a Schaublin collet in my lathe tightened very securely but as both parts are hardened they just slip. I have used moderate heat and penetrating oil without succ0ess. I am tempted to assemble the spindle with the chuck jaws in place in the jaw guide and hold the guide on its outsider diameter on a fixture I, will make and use the three jaw engagement to give me a fully supported method to hold the spindle but feel this is a last resort effort. Can you confirm that these two parts must be threaded with a left hand thread as otherwise I cannot see how the chuck operates and do you have any suggestions that might help? I have asked Metabo for a diagram of the chuck and suggestions but have had no response so far! Excuse me using this article web site but I cannot recall your original article on the Machinist site. Kindest Regards, NIGEL ALLEN 3.2.2015.
Original article: https://www.machinistblog.com/rebuilding-an-albrecht-drill-chuck/
(your email address above was removed to prevent spam)
Belts and disk and emery cloth are very dirty, which is why they grind cool. They let of dull particles an present a new sharp carbide. This means they pollute the shop.
When i see something like this I always think “Torsion box”…