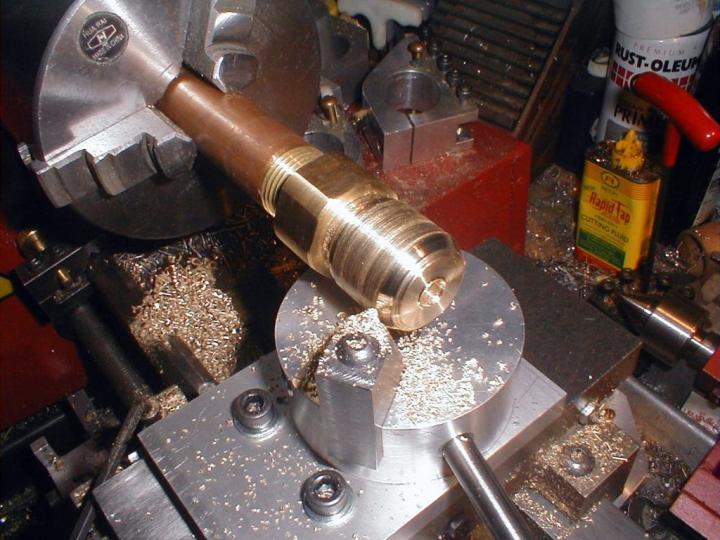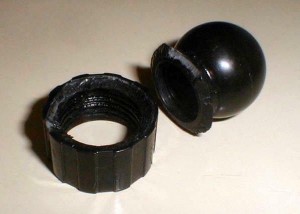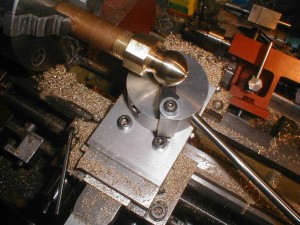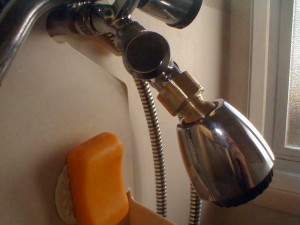
I want to tell you about Ralph Patterson’s free plans for a ball turning tool post that will fit a 7-by-whatever mini-lathe, and show you how he used it to fix a broken shower head. I’ve also included a YouTube video that shows a similar tool post being used to make a ball end for a tool handle. Near the end of the article you’ll find a link to download the plans for this tool, along with a link to where you can get Ralph’s other plans. And if you read carefully you’ll also find a link that leads to plans for a ball turning tool that will fit a 9×20 lathe.
This ball turning tool post is part of set of more than 25 free plans Ralph made for some very useful mini-lathe accessories and modifications. He also designed a boring bar holder, a quick change tool post, a leadscrew hand wheel, two versions of a tailstock lock, a carriage clamp based on Vicki Ford’s design, a die holder, a modification for slowing down the leadscrew feed rate, a file guide, a spindle indexer, a spindle crank, a height gage that uses a digital caliper, an adjustable tool rest for a bench grinder, and much more. In addition to drawing nice plans, Ralph also did something I think is very smart. He included photographs with most of them so that those like me, who don’t have a lot of experience reading prints, can easily see how the parts fit together and what the finished project will look like. He also includes a parts and material list with his more complicated designs, which is something I wish more people did.

Ralph is an excellent CAD drafter, skilled machinist and a gifted designer who knows a lot about mini-lathes. I’m very surprised that his designs and plans aren’t more widely known. (I intend to do something about that if he doesn’t mind).
His ball turner is adapted from one that Steve Bedair made for his 9×20 lathe. If you go to Steve’s web site you will not only find free plans for his design, but also photos showing how it is made and used, along with pictures of some of the things he has made with it. Besides things like ball ends for handles, this kind of tool post can also make beads on a straight rod, and with a little modification it can also do coves. They’ve also been used to make the lenses for optical center punches.
Ralph’s ball turner attaches to the top of the cross-slide with a couple of bolts and it doesn’t look like it will be hard to make. The most critical dimension is the height of the cutting bit and Steve Bedair has a nice picture that will show you how he measured it. The base has a recess that can probably be bored on a lathe if you have a 4-inch, 4-jaw chuck, otherwise you’ll need a mill and a boring head.
Ralph gives you a choice of four different tool bit holders that you can make. Three of them use carbide inserts and they’ll require you to mill a number of angles, some rather precisely. A forth version uses an HSS cutter made from a 3/16-inch drill bit. Both it and the HSS cutter look like they should be fairly simple to make.
If you would like to get in touch with Ralph or thank him for the plans then the best way to do that is to join the excellent 7×12 minilathe discussion group. [Editor’s note, 6/18/2020: After Verizon bought Yahoo in 2016, they made changes to Yahoo Groups that limited their usefulness and caused many to cease operating.]
Addendum 05/25/2011
There’s a small error in the plans. The materials list says to use aluminum for the body and base, but the plans say to use steel. I asked Ralph about it and he said to use aluminum, or whatever you would like.
He also had this to say:
“If I were to make the tool again, there are a couple of improvements to consider. In order to move the cutter toward the center of rotation as the ball is formed from the straight round stock, it is necessary to loosen the 3 clamping screws, re-position the slide, and tighten again. For doing that operation easily, the clamping screws should be on the right side of the body. To make room for the clamp screw holes, the operating handle should be moved a little further down the side of the body.
Secondly, moving the tool holder manually and guessing at how much movement has been made, it would be nice to incorporate a screw into body that can be used as an external feed screw to regulate that movement. The screw could have a shoulder that engages a slot in the side of the sliding part, so that the tool could be moved both into and away from the work. Maybe making the slider longer at the base would enable a feed screw/slider to travel through the entire desired range of distance. Some thought is required.
Thirdly, the cutting tool sometimes needs moving to the left of the axis of the swivel screw of the tool. This would enable the cutter to move much closer to the axis of rotation of the workpiece when working on the chuck side of the ball. Maybe the tool holding slide could be made a half-inch lower in height to enable a cap piece that is adjustable from side-to-side to be mounted atop the post. A variety of cap shapes might be useful.
I am dangerous when thinking about these possibilities, instead of trying them out first.
HTH, Ralph”
Downloads
Download Ralph Patterson’s Ball Turning Tool Post from MachinistBlog.com (PDF)


Hi,
I just found your site via the youtube “insight” function (185 views from your site)
I like finding sites in this way, it means they might make stuff I like too 🙂
Looking pretty good so far… A lot to read yet though!
I’m obviously not the Ralph talked about in the article, I’m another one 🙂
Just thought I could impart some info since I was here…..
The tool in the video was the first tool I ever made for my lathe… Best tool I ever made 🙂
I used Steve Bedairs plans and slightly modified the base and the cutting tip.
Now, the important bit….. if you want to use those tips that is.
VBMT 16 04 08-UR are the tips I used in the 9×20 version shown in the video. (mounted on a 12x12mm upright)
VBMT 11 02 04-UF are the tips I used in the 7x** mini version I made for another lad who hadn’t got a way to mill the slots. (mounted in an 8x10mm upright. pictures available if required by anyone).
Very happy that the video is being used to help others. That’s why I made it 😉
Ralph.
Hi Ralph AKA Divided Head,
I’m a big fan of your videos and projects. I’m hoping to find time soon to write about the mini-brass flashlights you designed and which John Somers has been writing about on Start-Model-Engineering.co.uk
— Rob
Hi Rob,
Happy you like my efforts…. Been a bit slow to complete anything recently. Life gets in the way!
The flashlights are the very first project I ever made on my Peatol (or Taig over there) lathe, I’ve made a few as gifts and given the plans (a Crap-o-Cad drawing) and the talk through you have seen on John’s site to quite a few people over the years. John was the first man to ever send me pictures of the completed articles (all I ever asked for in return).
He also very kindly sent me a surprise this week, one of the acrylic covered flashlights from his latest batch…. A great surprise to find on the mat when I got home 🙂
If you would like the same collection of information that goes with the videos just send me an e-mither and I’ll send them all through to you no problem.
Ralph.
Sir, I have a 9×30 Enco lath and like to have drawings for a ball turning toolpost. I saw a video of the one you made and would like one for myself. Thank you
Hi Clifton,
There’s a link in the article to download a copy of Ralph’s plans. It’s right under the heading “Downloads”. Just be patient if you have a slow connection, the file’s not that big but it may take a while for it to load.
I’d really like to build Ralph’s ball turner, but I haven’t had time yet. The video shows one that was made by Dividedhead (AKA Ralph).
Rob
Just completed the ball turning project for my 7X10 lathe. It came out nice. I am waiting on carbide inserts to complete the set.
This informioatn is off the hizool!
Dear sir,
Please let me know if this attachment would be suitable for ther EMCO 5 lathe. If yes, could I to obtain the plans and the value of them?
thanks
Alejandro
I am not familiar with the Emco lathe, but from what I’ve read it looks like it is a bit bigger than the 7×12. It seems to me that you may be able to use Ralph’s design if you increase its height so your cutter bit is located on the center line of your lathe. You could do that by increasing the height of the base plate, body and maybe the tool holder.
The plans are free. You can download them using the link that is located near the bottom of the article.
Good luck. I’d love to see a picture if you build one and Ralph probably would too.
I recently completed one of these for my minilathe. What a fun tool! It’s almost magical watching the spherical surface appear, and takes very little effort to use.
I eliminated the step in the bottom of the body, and the coresponding pocket in the base. Instead, I used a thin (.010″ thick) sheet of teflon between the two, and it turns as smooth as you please.
Hi.
I have just spent a couple of days in the workshop building one of these ball turning tools & I’m very pleased with the end result.
My first attempt at turning a ball ended up with a egg shape rather than a sphere !
Any suggestions on what I’m ding wrong.
Regards Ian
You need to get the center of rotation of the fixture exactly on the centerline of the part – front to back, using the crossfeed Side to side is not as critical. Do this by turning the fixture so that the cutting tool is pointed directly at the headstock. With the lathe off, bring the tool into the end of the part and turn the chuck by hand. Note that the “pip” the tool cuts in the end is a point, and not a circle. Adjust as necessary. Back off the crossfeed, and bring the cutting tool perpendicular to the part. Center the carriage (side to side) on the piece to be cut, and lock the carriage. Turn on the lathe and start cutting. If your ball looks like it’s turning out oval, you can adjust the crossfeed slightly to get it round.
Most of the problems with getting a round ball is because your center of rotation of the ball cutter is not on the centerline of the part.
Hi.
Thanks for the advice. I turned another ball today with excellent results. What a useful/fun tool to use,
Ian