By Roger Leete
This tool was made for my Grizzly G8689, but it can be adapted to almost any mill. Just choose the right sized socket for your particular drawbar. Note that I did not come up with this idea, but found it on the web. I made the parts based mostly on the materials at hand. Dimensions are mostly made up on the spot, and measurements were all made with a scale. In other words, this project requires no careful measurements or has any critical dimensions.
Socket
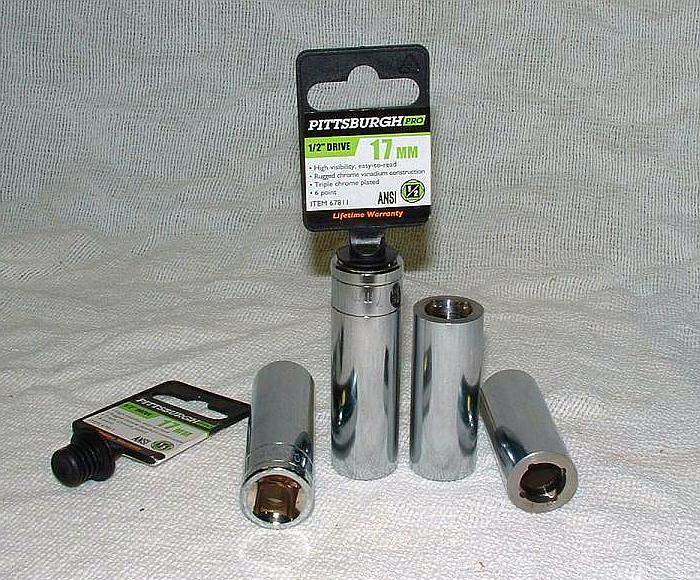
First step is to find a deep well socket that fits the drawbar. For my mill, that means 17mm. I bought sockets at Harbor Freight, but just about any cheap deep well socket will do. HF has them for about 2 bucks. As you can see from the pictures below, I cut about 1/2-inch off the drive end, simply parting it off at the line on the socket. (Some sockets have a different appearance, so roughly 2-3/8-inch long) This dimension is by no means critical. I was worried that the sockets may be hardened, but a standard HSS parting blade cut it cleanly and easily. This operation was done on a 7×12 mini lathe, so it’s not like you need an expensive machine to part off. When you break through to the square bore it will be an interrupted cut, so take it slow at that point, or finish with a hacksaw. Tip: get or make a carriage lock for your lathe. It makes parting so much easier.
Next operation was to bore out the square drive hole. Once again, this was done on the lathe. The square hole makes for an interrupted cut, so take it slow and easy until you get it round to avoid too much impact on the tool bit. Drilling first may be easier, to remove the bulk of the material. You want to bore it out enough for the inner filler piece, but leave enough wall thickness for strength. My bore is about 5/8-inch diameter, but this is not critical either. I purposely made the bore tapered slightly. I’ll explain why in the next step. Set your compound over a degree or two, and bore it out to size. The socket machining is done for now.
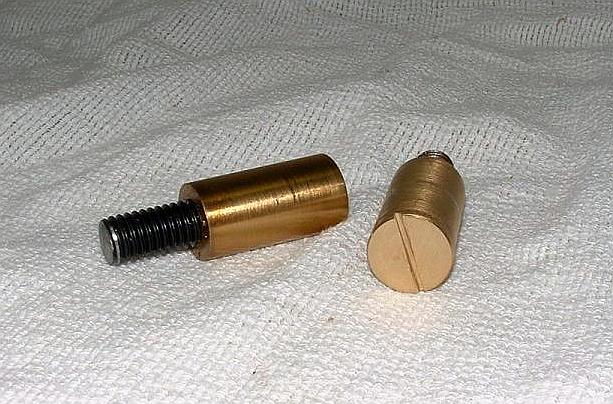
Next piece is the inner filler. I made mine out of brass for weight, and because that is what I had on hand. Steel would also work, but I’d not recommend aluminum as you want more mass. This piece is slightly tapered the same as the bore. The reason for this is to have it jam up into the socket to facilitate tightening of the hammer head. Once turned to size, drill and tap for the hammer head screw. I used 3/8-16, but 1/4-20 would work just as well. You want enough thread to hold securely, but if you go too deep, you’ll be tapping into the side of the screw when you make the handle. Using a hacksaw, cut a screwdriver slot in the opposite end.
The screw itself can be threaded rod, or just lop the head off a cap screw as I did. You could also turn the thread as an integral part of the filler piece. Screw it into the filler piece with a dab of Loctite to keep it in place. It only needs to stick out about enough to get good thread engagement on the head.
Head
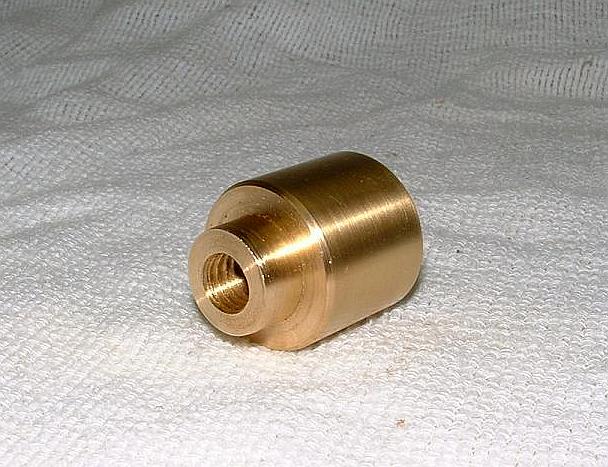
Now we need a hammer head. Brass is the material of choice, not only for the weight, but because it won’t mushroom over the head of the drawbar. I made it about 1-1/8-inch long. The undercut on the end fits fairly closely into the bored end of the socket. File a generous chamfer on the working end and break the edge where it meets the socket. Drill and tap for the same screw you used for the filler piece. Be sure you don’t go too deep, as you don’t want to break through. However, be sure you go deep enough so you don’t bottom out on the thread.
Handle
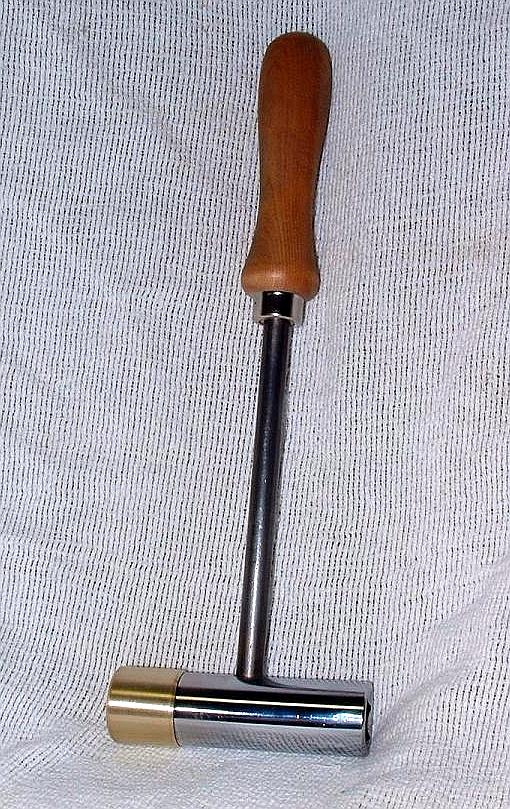
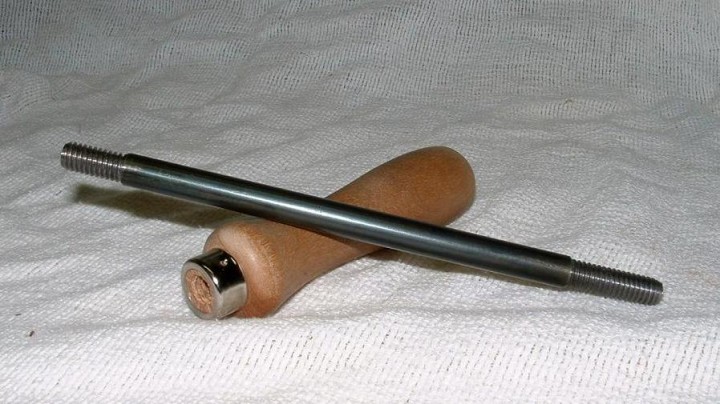
Select material for the handle. I suggest a minimum of 1/4-inch diameter, but that is pushing it for strength. 3/8-inch would be better. Thread the end to a length about 1/8-inch less than the outside diameter of the socket. This piece is just under 3/8, so I used a 5/16-18 thread. Make it long enough to give you decent leverage, but short enough so it’s convenient. The length of mine is determined by approximating the length of the wrench that comes with the mill, roughly 13 inches. I threaded both ends, and then tapped and screwed on a file handle. I think it gives a more finished look, and is more comfortable to use. File handles are cheap – search the web for the best prices. Obviously, a home made handle could be made fairly easily if you so choose. The bar for the handle is plain old cold rolled steel. I rubbed on some gun bluing to give it a better finish.
Assembly
Screw the head onto the filler, and tighten securely. Put it in the vise for your mill or drill, and drill a hole for the handle. Make sure you’ll be drilling into the filler, and not into the empty socket portion. Start with a center or spotting drill, so the bit doesn’t wander on the curved surface. Use the appropriate sized tap drill and drill through the socket into the filler, but don’t drill through the other side of the socket. Tap the hole for your handle. Either remove the filler piece and drill through, or use a bottoming tap. I also enlarged the handle hole to be a close fit on the shank of the handle, for a little extra strength. Screw in the handle, and you’re done. I used some Loctite to prevent it coming lose during use.
Place the wrench where it’s handy. I usually glue a small magnet to tools and stick them right to the column. Use the socket end to tighten or loosen the drawbar, and the hammer to give it a tap to drop the collet or chuck out of the spindle. It has quite a bit of heft for its size, so just a tap should loosen the most stubborn drawbar.
Nice job, Roger! I love custom tools like this.
Thanks for sharing it.
Very cool tool. Is this blog still active? I’ve enjoyed reading some of your older posts.
I have a Delta 21-100 mill with an R-8 drawbar system.
My collets all seem to be 7/16-20 thread.
So I bought some threaded rod and jammed two 5/8 hex nuts on it.
I have a long 5/8″ wrench and a 16 ounce plastic face hammer.
But that hammer is not enough mass to knock things loose when there is 5/8″ drill chuck in the mill.
I see commercial hammer/wrench combos as 3/4″ and not weighing more than 16 ounce.
The Roger Leete hammer/wrench does provide a system for making a heavier hammer and custom wrench size.
If you do not have an HF try the local pawn shops. They have boxes of loose sockets.