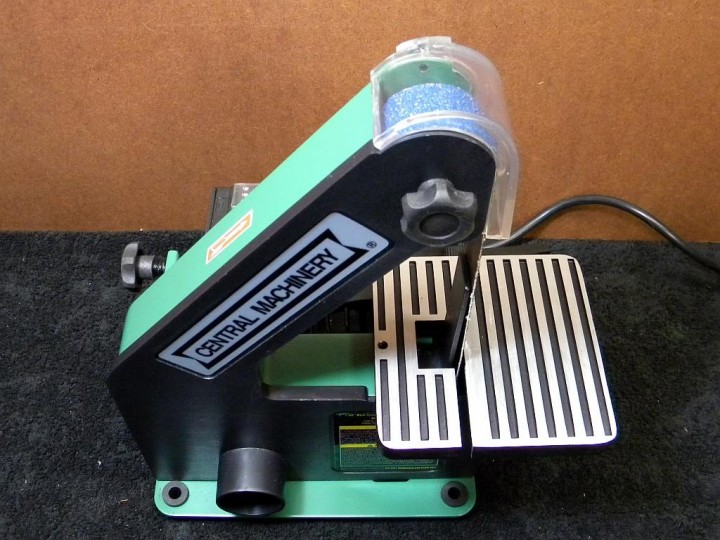
 This is a review of the Harbor Freight 1×30 belt sander, model #2485. I noticed it was on sale and remembered Mikey telling me that a belt sander is a better tool for grinding lathe bits than a bench grinder. So I checked the customer reviews for it on their web site and they were generally very good. Then I searched for machinists who were using it to sharpen HSS metal lathe bits. I didn’t find many, but I did learn that many wood turners were using it to sharpen their HSS blades. It was also highly regarded by many knife makers, who were using it to both grind the shapes of their blades and sharpen them. So I decided to take a chance and buy one. This review is going to discuss just the sander itself. I hope to follow it up later with another one that will talk more about how well it works for sharpening HSS lathe bits in a home machine shop.
This sander normally sells for $50 but it was on sale for $40. I used one of HF’s easy-to-find 20%-off any single-item coupons to get it for $31.99. I also purchased some Zirconia alumina belts for it because they were recommended by the knife makers. Harbor Freight only carries 40 and 80 grit belts in packages of two for $2.99. But you can easily find other vendors selling them in a much wider variety of abrasives and grits. You can even buy a leather belt for stropping edges and cloth belts you can impregnate with polishing compounds.
Lots of problems
My sander came with a lot of problem that hadn’t been mentioned by other owners so I started wondered if mine was typical or a rare lemon. I’d bought the last one at the store so I couldn’t exchange it for another one. So I did more research and learned that some sanders come with lots of problems and others with few or none. So, don’t hesitate to exchange yours if it comes with some quality control issues you can’t live with.
It was hard to put the belt cover on
It’s pretty quick and easy to change sanding belts. The belt cover is held in place by a single knob at the top and a couple of tabs at the bottom which fit into slots. Mine came off easily but it was difficult to put it back on because it was hanging up in a couple of spots on the frame, which seems to be made of either die-cast aluminum or zinc alloy. I found some thick paint runs in those places which I removed with a finishing file. I also found a small burr around the inside edge of the plastic cover which I removed with sandpaper. It’s now much easier to put back on.
To change the belt you’ll also need to remove a small transparent plastic cover over the top wheel that is held on with a Phillips head screw. The screw just needs to be loosened and I’m already thinking about eliminating the need for a screwdriver by making a knob or button for it.
The belt tracking couldn’t be adjusted properly
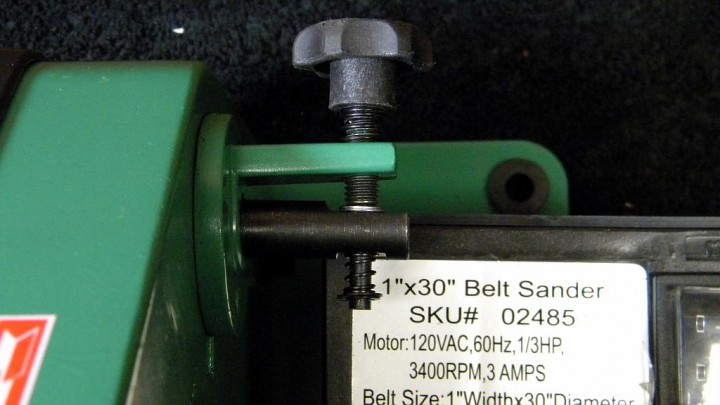
The motor and idler pulleys have an aggressive crown which helps the sanding belt stay on them. One of the pulleys can be tilted with a knob to control the belt’s tracking. I was pleased to find the belt would stay on over its entire range of adjustment. But I discovered I couldn’t adjust it enough towards the motor to perfectly center it. Adjustment in that direction was limited by a spring used to prevent vibration from turning the adjustment knob. One of my photos will show you how I easily fixed it by adding a couple of small washers to push the adjustment lever more in the direction I needed it to go.
The motor pulley was loose
While troubleshooting the belt tracking I discovered that the motor pulley was loose and not positioned correctly on the motor shaft. Probably because it had been put on backwards so you couldn’t get at its locking screw.
The table leveling screw was too loose
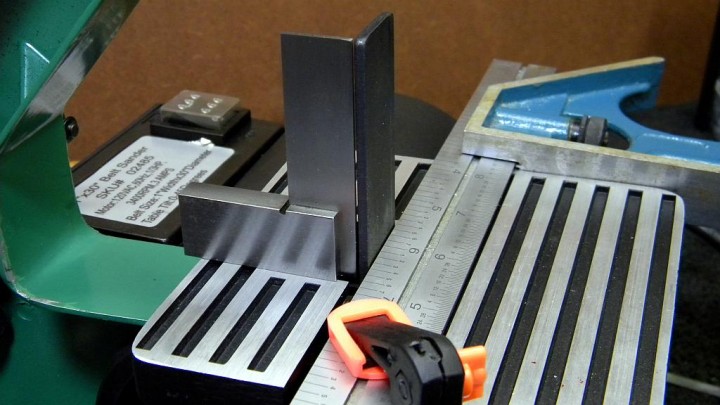
The sander’s table is suppose to adjustable from 0-45 degrees but you can actually adjust it so it’s almost vertical. There is a 6mm set screw near the back edge that you have to adjust so the table will stop when it is perpendicular with the sanding belt. Unfortunately, the screw fit so loosely that it was sure to turn and lose its adjustment because of vibration. Its size and location makes it hard to put Loc-tite on it so I’ve replaced it for now with a bolt. The bolt sticks up above the table but that’s not a problem because it’s behind the platen. It fits better and is easier to adjust but it also needs something to prevent vibration from turning it. So I’m considering one of these fixes:
- I may try adding a spring between bolt head and table, like the one that is used to prevent the tracking adjust knob from turning. But there may not be enough room and I don’t have a longer bolt.
- I may use Loc-tite. It will be easier to apply to the bolt but it might not be good idea if I find I need to periodically adjust it.
- I may try an idea I heard about, which is to cross-drill a hole in the bolt’s threads for a piece of nylon trimmer line from a weed whacker. The slightly too long piece of nylon is supposed to take up space and prevent the bolt from turning too easily.
The platen wasn’t perpendicular
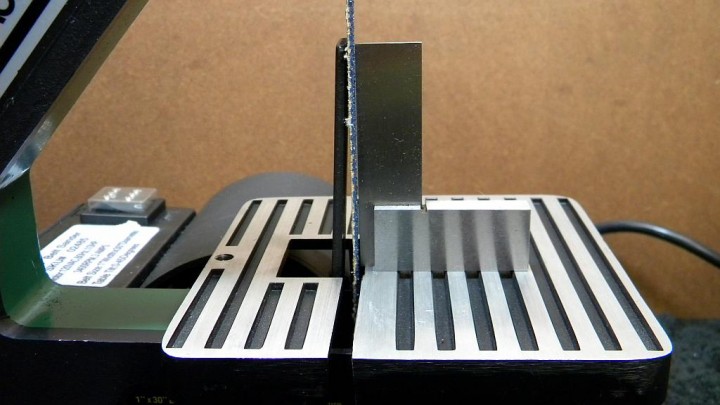
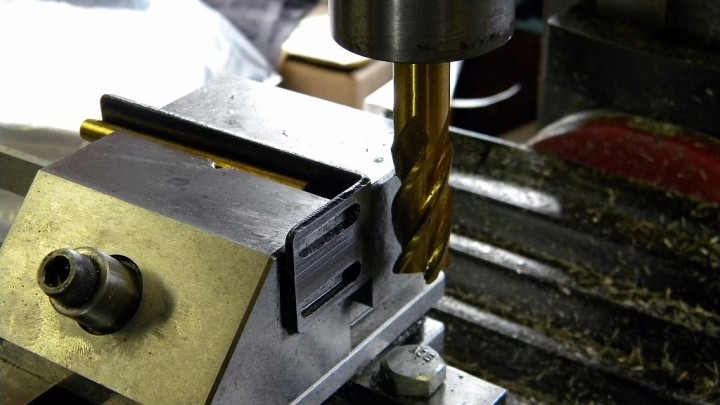
Even with all these problems my new 1×30 belt sander would have been very usable right out of the box if it weren’t for one thing. The platen, which is right behind the sanding belt and the thing you push your workpiece against, was nowhere near parallel with the belt. So I put it in a vise and tapped it with a hammer until it was almost a right-angle and then I bent it by hand until it was perfect. I may machine a replacement if it doesn’t stay that way.
The platen wouldn’t stay in place
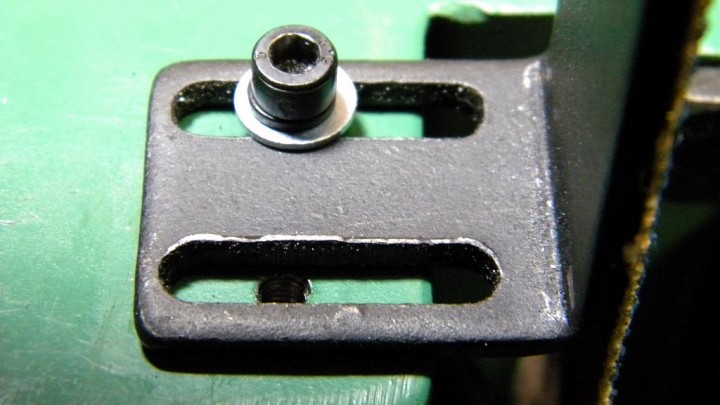
The platen shifted after I used the sander a couple of times. I found a big tall burr along one of the adjustment slots was limiting the holding power of one of the mounting screws. So I filed the top flat and replaced the original flat washers with larger ones.
The platen was tilted
My platen was tilted to the right so it stuck out from behind the belt. It looked like it was because the bottom was bowed when they stamped the slots in it. I tried filing and then milling it flat but that didn’t completely fix it. It turns out I had to also file the frame flat where it was mounted.
It vibrates more than it should
It’s acceptable, but I think the sander vibrates more than it should. I think it’s probably caused by the pulleys which all have a very noticeable amount of run-out, especially the motor pulley. At this point I don’t know how I’m going to fix it or if I’ll even bother. They’d be easy to true on my lathe if I can figure out how to mount them (I still don’t own any mandrels). I may also retrieve my favorite lathe file, which is on loan, and use it to try and remove the high spots while the pulleys are still mounted on the sander. Please speak up if you think you have a better idea.
The table
The table is one piece and die-cast from either aluminum or zinc alloy. I think it locks easier and more securely if you add a flat washer between the adjustment slot underneath the table and toothed washer the factory wants you to use.
I expect to modify the table someday to make it easier to grind precise angles on lathe bits. I’m still kicking ideas around. One is to bolt an aluminum plate on top of the table with grooves for a small miter gauge. Another is to bolt on a straight edge that I could slide angle plates along. Until then I’m probably going to just draw some reference lines on it.
Some final thoughts
- I suggest you buy some some Norton or other high quality belts for your sander instead of the belts Harbor Freight sells. I’ve found that the abrasives sold by HF are usually not very good.
- Even with all the problems I found I’m still happy with my purchase. But I don’t think that would be true if I hadn’t been able to fix all of them or if I’d paid a lot more for it.
- It takes up a lot less space than my bench grinder, it’s lighter and it seems to produce less dust. It may also be safer to use.
- It’s small and cheap enough so that I can maybe see myself owning two of them someday, one with a course grit belt and the other with a finer grit.
More Photographs
Great post.
Teflon tape should prevent the bolt from coming loose, if you haven’t figured something out already.
I suppose for 30 bucks it’s not bad, but it sure doesn’t sound like a bargain. Too bad some of this stuff isn’t already handled by the factory.
As to mandrels for the pulleys, make one! You ought to be able to knock one out in a few minutes, and reducing vibrtion will be well worth the effort. It will make everything run smoother, last longer and be quieter.
I didn’t want to use my 7×12 mini-lathe to make a mandrel because cutting tapers on it can be a pain in the you-know-what. You just made me realize it shouldn’t be a problem with my new 8×12 because the tailstock and compound are much easier to adjust.
I had many of the same problems. I took a rod of aluminum and used my mill and lathe to create an identical version of the motor shaft and then mounted it in my lathe chuck. Then I mounted the motor pulley on that and trued the pulley on the lathe. That got rid of 98% of vibration. I may someday try truing the smaller pullys but that will require more effort creating a lockable shaft for them on the lathe just to get 2% more perfection, but I do like perfection. You can see me using my belt sander at the midpoint in this video on my blog… http://panofish.net/brazing-metal/
I had the same motor pulley vibration issue. I also considered truing the wheel while on the motor via file, but, opted a quick a dirty fix by building up the low side with strips of electrical tape until it just about spun true. It actually worked remarkably well; however, the only solves the vibrations from the belt pulsing and not the slight imbalance of wheel. Mighta, shoulda, still may, just file it true while running…
This sander is trash! I had to replace both idler pulley bearings and now the motor is slow starting and has no torque. Great service for a seldom used 2 year old sander!
I guess I’ll tear into the motor since the start cap is OK.
I have the Grizzly version of this sander. Looks exactly alike. The tracking is not very good, the cover is a pita to put back. Other than this it has worked well for me for ten years.I paid about $30.00 for the sander.
I recently built a two wheel sander 1×42 like the “Kalamazoo”.This brand is top of the line for 1×42 ,2×42 sanders. I do a lot of metal lathe work and needed a sander for metal only. I had every thing I needed to build the sander and am pleased with it.If I could have bought the belts I needed in 1×30 I would not have bothered to build my own.
Two wheel sanders track much better than the three wheel type.
I was wondering if you could provide me a basic physics rationale why the commercial Harbor Freight sander has THREE wheels instead of two?
you need the third wheel to provide clearance behind the belt.
Hi. Thank you for your help. I saw on a you tube video that explained right out of the box on how to adjust the belt tracking setup so that you can push the knob towards you when replacing or changing the belts. It doesn’t even tell you you can do this in the instructions. It just says you can loosen the belt by turning the screw clockwise or counterclockwise. But I guess your supposed to be able to press it also. And the guy in the video shows you how to loosen it and fix it. But I cannot find the video and can’t push the tension button at all. How do you do it? Can you press yours? Thank you kindly,
Chad Lewis
I have had the same experience with this belt sander. I also saw this great deal to get great deal on a belt sander as I needed one anyway but haven’t gotten to actually buying one – keep procrastinating I guess.
I decided to search a bit and found this really informative website all around sanders. Personally, it made me pick a better sander as I returned the Harbor Frieght – now I got a Black & Decker DS321 – it works perfect.
Before I post this comment I really want to thank you for updating your blog with all these informative posts. Hopefully you got a full refund as I did, if not, that sucks.
Take care!
Yet that sander is not the same type at all. Stationary belt sanders are used for a much different purpose than hand held finishing sanders.
Apparently, you didn’t read the article at all, but just came here to post your link. Sorry, deleted.
Good call, Roger!
wow, I did not have any of these issues with mine. It was pretty much plug n play!
thanks your post! i can know several essential features. at present, i’m able to have peace of mind to use!
I have one of those, made by Ryobi, that has been on my bench for about a decade. I tossed the cover and guard long ago, and have not missed them.
I also made a better platen.
I primarily use a 2×72 sander now, but keep the little one mostly for use with a leather stropping belt.
I suspect the tracking issue is hit or miss. Mine works well.
I can’t get the new 1×30 belt on. I changed it before. Acts like I need 30.25 or even 30.5 to get it around all 3 wheels. -J Watson