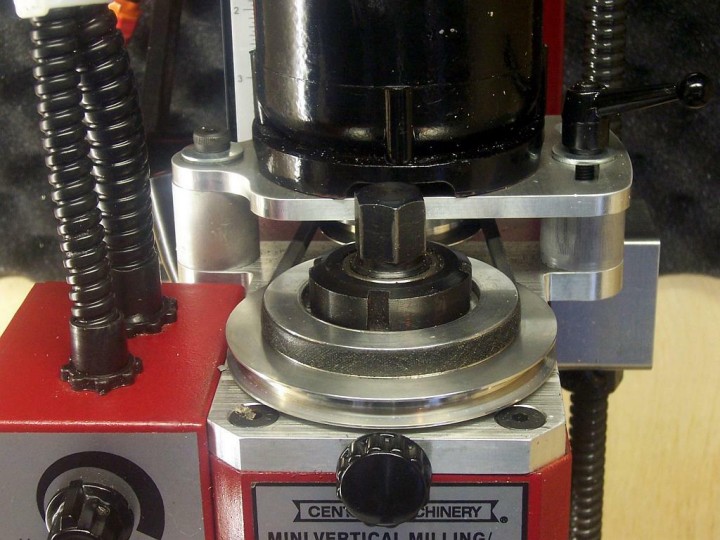
I wanted to move the belt drive from my old mill to my new CNC mini-mill. Well, the spindle nut didn’t want to come off, which didn’t make sense because I didn’t have any problems putting it on six months earlier. I went looking for pictures and advice on the Internet and had trouble finding any. So I wrote this article.
My goal is to:
- Show you how quick and easy it is to install a belt-drive kit on a mini-mill.
- Discuss the advantages of using a belt drive.
- Tell you about a dumb mistake I made so you won’t do it.
- Briefly explain bearing preload and how it can cause your spindle bearings to get too warm after you’ve installed a belt drive or taken your head apart for some other reason.
The belt drive kit for my mini-mill was made by the Steele Company which no longer seems to sell them. You can buy a nearly identical one from LittleMachineShop.com for about $155. It’s pretty easy to install and will probably take about 20-40 minutes. You can also find plans and instructions on the net if you would like to build your own. If you can make a pulley on a lathe then it shouldn’t be too hard.
There are some good reasons for installing a belt drive:
- It will eliminate any chance of breaking a drive gear, which can happen pretty easily if your cutter jams. Instead of a gear breaking the drive belt should slip instead.
- It will increase the top speed of your spindle from about 2500 rpm to more than 4000 rpm, which is important if you use very small end mills or drills.
- Your mill will run much quieter.
- A belt drive may also make it easier if you ever want to mount a different motor on your mill.
Before you install your belt drive I suggest turning your spindle on as fast as it will go and walking away from it for about 10 or 15 minutes. Then feel or measure how warm the milling head gets. That’s about how warm it should get after installing the belt drive.
The bearings in my CNC mill’s head started running hot after I installed the belt drive because I tightened the spindle nut just a little too much. The more you tighten that nut the more “preload” you give your spindle bearings. You want to preload them enough to eliminate the internal play in them (which can cause run-out), but not so much that you cause excessive friction, heat and premature wear. The nut doesn’t need to be tightened very much and I only had to loosen it a little to fix the problem.
One thing you’re going to have to do is to unscrew the spindle nut on top of the head. There’s two things you need to know before you do that:
- It has a left-handed thread, so it’s going to turn it the “wrong” way.
- Before you start unscrewing it you need to loosen the set screw in it. That was my dumb mistake. Even though I’ve seen it many times I still forgot it was there because it was facing away from me when I inserted the pin to lock the spindle. Luckily, I stopped turning the wrench before I did any real damage.
Disclaimer: This is an overview. These instructions are not meant to replace the ones that come with your belt drive kit.
no images were found

Igor over on the mini-mills discussion group made a belt-drive for his “Red Bull” mini-mill.