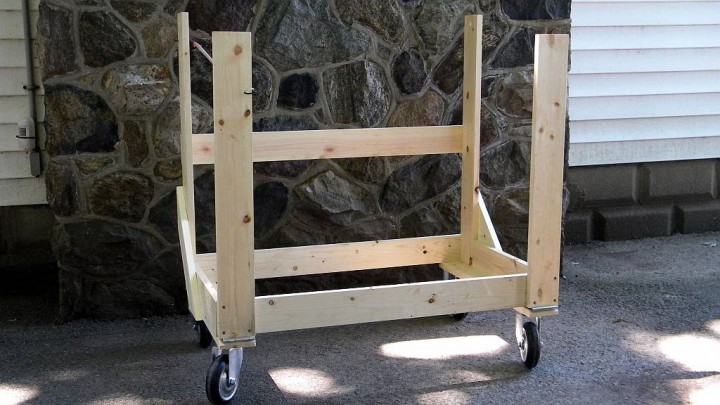
Building the stand for my Solsylva 25×25 CNC router was pretty simple. The hardest part was attaching the hinged support. I also had some trouble finding straight lumber for it and the rest of the router. David Steele’s instructions and drawings are excellent and are easily among the best I’ve ever seen.
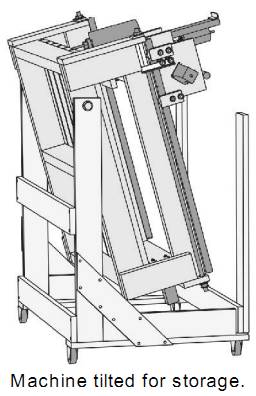
The stand supports the router and it provides you with a work table to build it on. It can be put on casters so you can easily move it around and it’s designed so the CNC router can be tilted down to take up less storage space. It’s a pretty good design but I wish I’d just built a table out of 2x4s instead, because the fold-down feature doesn’t really save much space and it may never get used. Such a table would be stronger and unlike David’s design you could add shelves to it for storage, or compartments for a computer and/or dust collection system (shop vac).
The Plans & Design Goals
There are 109 pages of instructions and drawings that are very well written and drawn. David Steele doesn’t just provide you with some drawings and general instructions and then leave it to you to figure out the rest. He breaks the entire construction process down into a series of small steps that almost anyone can follow, even someone who doesn’t have a lot of experience building things or working with tools.
He designed this CNC router so it could be built with very basic inexpensive tools and so you can buy most of the materials at your local lumber yard or home improvement center. Those are huge advantages for many. But the downside is the router isn’t as good as it could be if were designed to be built with better materials and by someone with more skills and access to better tools.
I hope that someday David will offer an “advanced” design or add more options to his current plans, such as an extruded aluminum or welded steel frame. In the meantime you can learn about modifications and upgrades by reading about what other builders have done. CNCZone.com is one of the best places to do that and you can find some great builder’s logs there. Unfortunately, the best message threads have often grown to contain dozens or hundreds of messages and it can be very time consuming to read through them all.
Buying Wood
It’s really important to use the straightest boards with the fewest knots you can find, especially for the router’s frame and gantry. It seems that lumber quality is getting worse because of “factory forestry” and I spent almost two hours patiently sorting through entire piles of lumber to find the best boards. At one point I thought I might have to come back again or go somewhere else to find enough good 2x4s and 2x6s. I’m glad I purchased extras because when I got home I found that some of them weren’t as good as I’d thought.
I learned a few things about buying 1-inch thick pine boards. My Home Depot had 3 grades. The least expensive was “#2 premium” and it had the most knots. The next grade was “D/BTR S4S”. It cost more but it had fewer knots. S4S means “sanded 4 sides” but its nice smooth surfaces are actually made with a planer. “Select” was the top grade and of course it cost the most. It didn’t have any knots and it was also sanded/planed. However, the select boards weren’t any straighter than the other grades, and they were maybe even worse because there were fewer to choose from and they’d probably been picked through more.
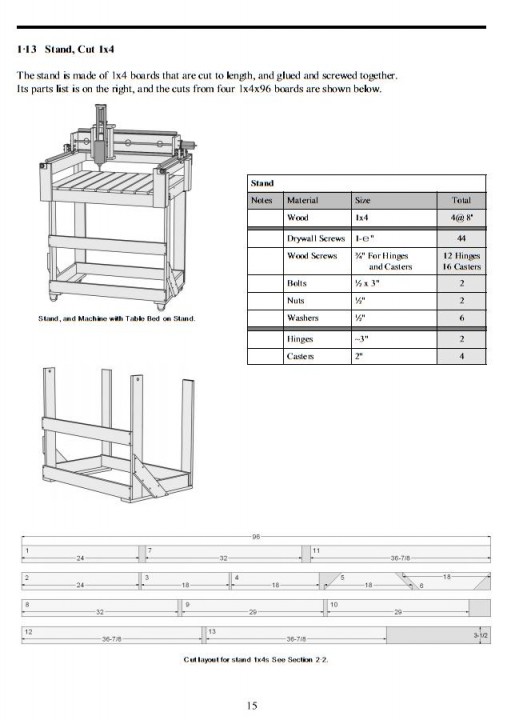
My stand was built out of three 1x4x96-inch pieces of #2 pine that cost a total of $13.93. It also used a cheap pair of 3-inch hinges (about $3), some screws, wood glue and a set of casters.
Some suggestions if you build your own
- David just suggests that you countersink your screws. I think it’s essential because countersinks are very inexpensive, they’re easy to use and you’ll get much better looking results. He also has you pre-drill the through holes for the shorter screws with a 3/16-inch drill. I thought that was too big so I used a 1/8-inch one.
- All the wooden pieces are fastened together using both screws and glue. The glue can cause your pieces to slide around while you’re trying to screw them together. But don’t skip or skimp on it because it will provide much more strength than the screws. You may find it helpful to “dry fit” the pieces and drill your holes. Then take them apart, add the glue and reassemble them. Clamps can also be very helpful.
- I used casters that were left-over from my 4×6 bandsaw cart project. Casters can be expensive but there’s a cheap way to get some if you have a nearby Harbor Freight store. Just buy one of the mover’s dollies they often have on sale for $8-$12 and take the casters off of it.

You and others may be interested in these CNC Stepper motor drivers, displays, and Manual control pads. I’m seriously considering ordering a driver, display, and keypad but they would be used on a low frequency antenna so that it can be automatically tuned for operation across a very wide frequency range.
http://www.aliexpress.com/fm-store/205058/211036708/Mechanical-Electrical-Equipment.html
For good, straight, clear pine boards, go to Rochester Lumber Company on N. Washington Street in East Rochester. Not as cheap as the big box stores, but much better lumber and service. The quality is so good that you won’t have to pick through the pile, but they will still let you if you’re extra fussy. I go there for all my sheet goods as well, because their ply is better quality with fewer plugs for just a couple bucks more a sheet. And, they load it for you.